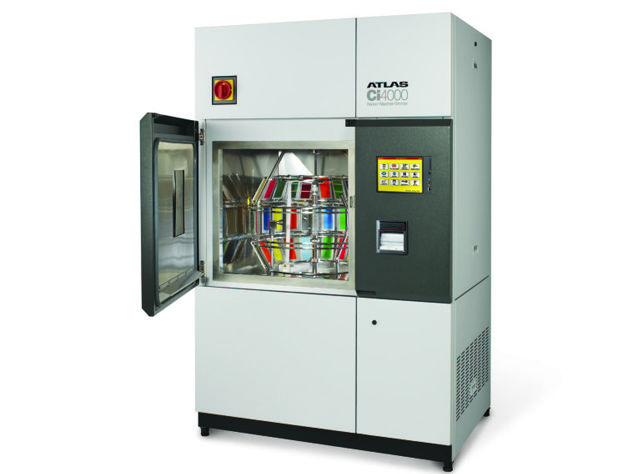
Durability tests and the service life predictions for materials and products that are derived from them are a challenge for every product development team. When designing a testing program, one of the first questions that you will undoubtedly ask yourself is “What is the ideal test for my material and/or product?” Answering this question is not always easy as the world of weathering and durability testing is so versatile that it can quickly become confusing.
But it does not have to be and knowing the right questions to ask yourself can help make choosing the right test method for your material or product easier.
Where Should I Start?
If you are having trouble deciding where to begin, it helps to kick start the process by asking yourself the question “Do I want to test materials, or components and full products?” Testing samples of candidate materials to use in your finished products will give you a running start in overall product development by validating that the materials you have chosen will stand up to the test of time when exposed to light, heat, and moisture—the three factors of weathering.
A thorough material selection process will take time, which is something that your product development cycle might not have, but not to worry. Material level testing has the advantage of having both outdoor and lab accelerated testing methods available that can help to validate the correct material for your purposes in a fraction of the time as compared to natural weathering. In addition, you will have the benefit of knowing that your final product has a higher chance of success because of the due diligence that went into the material selection process.

Material Level Testing
Two foundational questions in the product development cycle that engineering teams spend a lot of time answering are “What material(s) should we use?” and “How long can we expect the materials to last?”
Performing weathering tests using xenon instruments helps to answer these questions by exposing samples to high fidelity simulations of natural sunlight, sunlight filtered through window glass, and retail lighting in addition to defined relative humidity and chamber temperature conditions. Benefits to using a xenon test method:
• Highly realistic solar simulation, especially in the UV wavelengths
• Full-spectrum solar exposure (UV/VIS/IR)
• Stable UV output throughout test duration independent of irradiance level
• Adjustments for outdoor/indoor conditions via optical filters
These four benefits ensure realistic material testing and qualification. With xenon testing, we focus on the physical change/degradation of materials caused by UV photo-induced oxidations and secondary chemical reactions.
Xenon test methods are typically designed with time-compression in mind and utilize intense light and temperature conditions (ISO 4892-2, ASTM D7869, ISO 105-B06) to speed up the degradation process. Thus, we can study various material property changes in a relatively short time (color change, yellowing, gloss loss, cracking, blistering, adhesion loss, or loss of physical strength).
Demonstrating the importance of material level testing, some automotive OEMs require that prior to performing component or full vehicle testing, all surface and decorative materials in irradiated areas (interior and exterior) must have positive test results from a xenon exposure according to a specific internal standard. This is critical for establishing a material/component warranty period.
Material level testing is typically done on flat coupons or panels of material that are as close to the finished state as possible. Standard sample sizes for testing in a rotating rack Ci Weather-Ometer are 2.5” x 5.5” and 3” x 6”, while material samples tested in a flat tray SUNTEST instrument can be of various sizes as they do not require the use of sample holders. If choosing to use an outdoor accelerated method, samples can be up to 6” high and 0.5” thick with varying sample widths.
Component Level Testing
When testing at the component or product level, the focus moves away from studying UV photo-induced degradation towards product durability testing under realistic solar environmental stress, also known as heat load testing.
The critical questions to ask now become “Can we reveal all the potentially negative interactions of the different materials used in this component/product? Will the materials work together? Does product performance or functionality suffer?”
Solar environmental stress testing has a different scope and therefore different methods. Larger solar environmental test chambers use metal halide based solar simulators because of the following benefits:
• Highly fidelity solar simulation, especially in the VIS and IR wavelengths
• More efficient than xenon for exposing large areas/volumes
• Realistic solar simulation of UV wavelengths
• Adjustments for outdoor/indoor conditions via optical filters
These four benefits ensure realistic product performance testing. With metal halide based solar environmental testing we focus on so called solar heat load testing. These test methods are typically set up as simple steady state tests, such as IEC 60068-2-5 Sa 1, 2, and 3 for electronics and DIN 75220 long term tests for automotive components/products such as D-OUT-T for simulation of dry/hot climates and D-IN1-F for simulation of hot/humid climates.
Other product test methods like DIN 75220 Z-OUT-T and Z-IN1-T make use of solar loading combined with hot/dry and cold/humid cycles to add periodic mechanical stress. The combined stress tests are particularly good at revealing the impact of interactions between different materials. Thus, we can study various product performance changes, as well as functionality, in a relatively short time.
This article was written by Dr Oliver Rahäuser, senior product manager at Atlas Material Testing Technology and first appeared as a blog post on their company website. It is only reproduced here with their kind permission.

